
Cooker hood, a kitchen device capable of sucking smoke and odor. The smoke produced from the cooking process will be drawn up through the chimney and ejected into outer space, so that the air in the room was kept clean and fresh. Cooker hood in order to function properly, the following are the things you should look. Or Click here.
Identify the type Cooker Hood
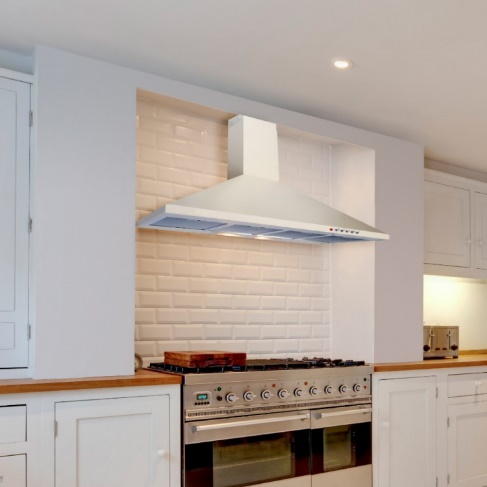
Cooker hood consists of three types of forms, which are shaped like a chimney, slim hood and a built-in hood. If the area is not too large kitchen, choose a slim hood or a built-in hood to save space. Meanwhile, if you want to use on the island table, then choose the model of chimney cooker hood (funnel-shaped) that can be hung on the ceiling.
Adjust the size of the Stove
Before installing the cooker hood, make sure the stove is used is no larger than the size of the cooker hood so that the tool can work optimally. The average size gas stove is available in the market ranging between 70 cm, while the portable gas to more varied, ranging from 30 cm, 60 cm, 70 cm and 90 cm.
Distance With Stove
To generate maximum suction power, note the spacing between the cooker hood and the stove. Installation ideal distance ranges from 60 cm to 90 cm. For this type of gas stove, cooker hood should set the distance of not less than 70 cm. While on the type of electric stoves, the recommended minimum distance of 60 cm.
Check the condition Walls And Ceilings
Because it is located attached to the wall, before installing the cooker hood and slim models built in hood, make sure the first condition of the wall. The suction tool will be installed by using Dynabolt to the wall. As for the type of chimney cooker hood (chimney), make sure the ceiling is strong enough to support the weight of the cooker hood. Type ceiling strong enough to withstand the load among other concrete or steel frame brackets connected to the hollow concrete blocks.